
I recently had the opportunity to try out some new hair products, and here’s my fantastic experience!
Up until this point I had never owned or purchased any of Clairol’s products. I was REALLY excited to give the new Color Crave line a go, and I’m happy to say I came out of this experience feeling pretty great about the brand.

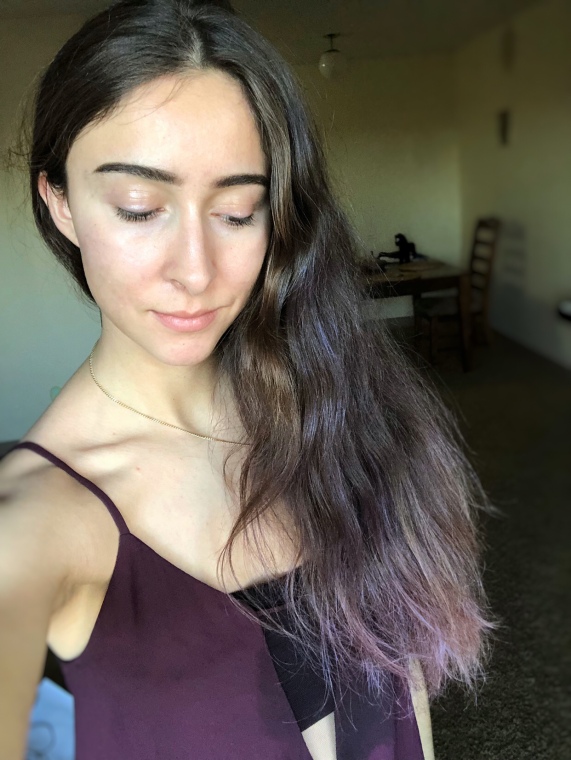
In the mail I received two products for free, courtesy of Influenster. First up is the less hands-on color applicator, the ‘brilliant amethyst’ hair makeup.
“Hair Makeup” is seriously such a perfect name for the product. I’m a big fan of the easy-to-use sponge applicator, and the colour I picked, brilliant amethyst, is just SO gorgeous. After applying it I seriously wished it was permanent.
If you have tons of thick, dark hair like I do, it’s going to take some time to apply enough to cover the strands you want covered, as well as enough to get the colour payoff you want. This step can feel tedious, but it’s well worth it. It’s easier to braid or style your hair first, and then apply the product directly to a braid/specific strands.
I also figured out some tips to maximize the intensity of the colour you’re applying, without having to re-do the same strands over again.
First tip! Use a diffuser when you’re blowdrying to set the colour. It will stop you from turning your hair into a tangled, frizzy mess that when you comb it out, will remove some colour from your hair. It also lets you manage applying heat a little better to your strands, and you’ll be able to more easily see when your coloured hair is dry.
Secondly, after colouring and blow drying your hair, you might find it’s a little “crusty” to the touch. To get back it’s orignal softness, take a wide-toothed comb and run it gently through your ends 2-3 times. If you use a regular brush, or a many toothed comb, you’ll find that a little bit of the colour comes off again.
Even with dark hair I can say I’m impressed with how this looks and how long lasting it is. The brilliant amethyst is beyond pretty. ❤️ Check it out for yourself, it’s available at Walmart and many other places!
NEXT UP is the Color Crave semi-permanent color, which I got in ‘scarlet’. If you have ZERO experience colouring your own hair, I would definitely recommend watching some tutorials or reading a little bit more about colouring techniques before you try it out on your own. My ends have been previously bleached more than a year ago, so it was the perfect time to try out something a little more bold. The instructions that come with the kit were more than enough to get me going, and I imagine a total beginner would figure it out pretty fast too.

BIG fan of the result. The red colour that this product gives is simply sooo beautiful. The next day after taking the above picture, I immediately went back and applied more to more sections of my hair.
I was initially a little disappointed that the brilliance didn’t last 15+ washes, but I did adore the rose-gold color that my hair was fading too as the color washed out more and more. I know it’s guaranteed 15 washes, so I feel like I should be more annoyed by this, but the color it was fading to was just SO pretty that I can’t even bother with be mad.
Next time I get my hair dyed, I do plan on dragging myself into a salon. But if I ever got the urge to do another dye job at home, I would totally purchase this again. Don’t hesitate to go to town on the color if you decide to check this out for yourself, it really is beautiful!


